
Fixing a cracked concrete slab without the massive expense and disruption of tearing it out is entirely doable. The right approach depends on whether the crack is structural (moving and growing) or cosmetic (hairline or stable settling).
For a permanent, professional-grade repair, the process involves preparing the crack, selecting the right filler, and sealing the joint. Here is a comprehensive guide to repairing concrete slabs effectively.
Step 1: Diagnose the Crack Type
Before fixing any concrete crack in slab, it’s important to identify the type of crack you’re dealing with:
- Hairline Cracks: Small, shallow cracks that form as the concrete dries and cures. These are typically harmless and affect appearance more than performance.
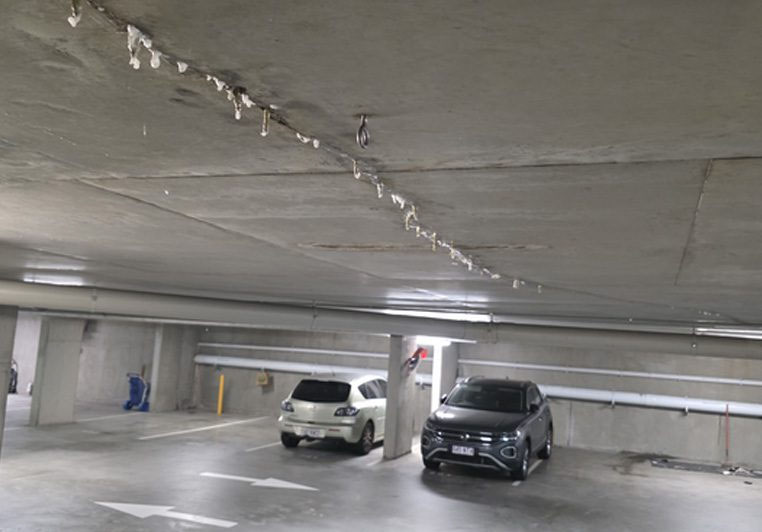
- Active or Settling Cracks: Cracks that widen over time or create uneven surfaces may point to slab movement or settling foundations and often need structural attention.
- Expansion Joint Cracks: Cracks occurring at expansion joints should never be rigidly filled. Instead, they require a flexible sealant that can accommodate natural movement in the concrete.
Step 2: Choose the Right Repair Material
Using standard concrete mix to patch a crack will almost always fail—it cannot bond well to old concrete in thin layers and will pop right out. Instead to fix cracked concrete slabs without costly replacement, use one of these specialized materials:
| Repair Material | Best Used For | Key Advantage |
| Polyurethane Sealant | Driveways, patios, and expansion joints. | Remains highly flexible; moves with the slab during temperature changes. |
| Epoxy Injection | Structural walls, indoor slabs, or foundational concrete. | Cures harder than the concrete itself; restores structural integrity. |
| Polyurea Fillers | High-traffic commercial floors or rapid-cure DIY fixes. | Sets incredibly fast (minutes) and penetrates deep into thin cracks. |
| Polymer-Modified Cement Mortar | Deep, wide, non-moving cracks or spalled edges. | Excellent adhesion and high compressive strength. |
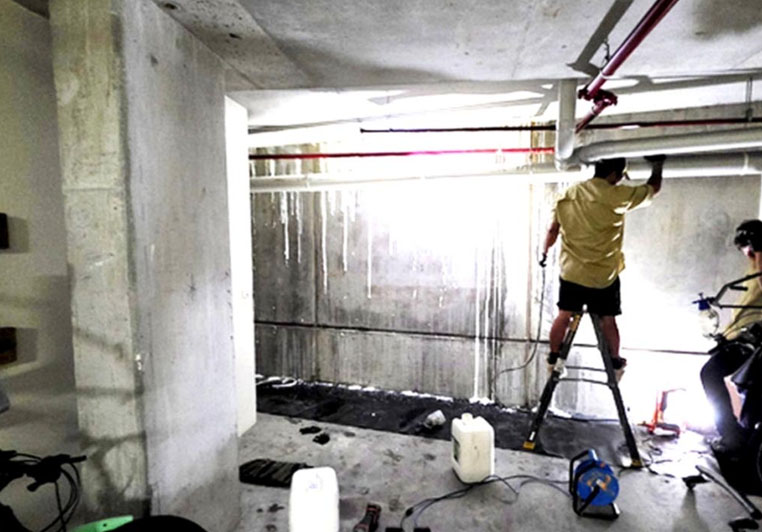
Step 3: Proper Surface Preparation
(The Most Important Step)
The strength of any concrete crack repair depends heavily on the preparation. Poor cleaning can prevent the filler from properly adhering to the concrete surface.
- Chase the Crack: Carefully open the crack using a hammer and chisel or an angle grinder with a diamond blade, forming a shallow “V” or “U” groove for better product penetration and bonding.
- Clean Thoroughly: Remove all loose aggregate and crumbling concrete with a stiff wire brush.
- Vacuum the Dust: Finish by vacuuming out fine dust and debris with a shop vac. For best results, ensure the area is completely free of moisture, grease, and contaminants.
Step 4: The Repair Process
Method A: Flexible Polyurethane Crack Injection (For Moving/External Cracks)
Recommended for outdoor concrete surfaces such as driveways, footpaths, and slabs prone to movement.
- Insert Backer Rod: If the crack exceeds 12mm in depth, press a foam backer rod into place. Keeping the sealant depth at roughly half the crack width improves flexibility and long-term performance.
- Apply the Sealant: Carefully inject the polyurethane sealant into the crack using a caulking gun, filling the joint slightly above the surface.
- Tool the Joint: Smooth off the sealant with a trowel or a gloved finger dipped in soapy water so the finish sits clean and flush with the slab.
Method B: Epoxy Crack Injection (For Structural/Non-Moving Cracks)
Concrete cracks don’t have to mean costly replacement—structural epoxy injection restores strength and stability.
- Injection Ports: Installed every 6–12 inches for precise delivery.
- Surface Sealing: Epoxy paste locks the crack, ensuring full penetration.
- Controlled concrete crack injection: Liquid epoxy is pumped from the lowest port upward, bonding the slab internally.
- Professional Finish: Ports and paste are removed, leaving a smooth, reinforced surface ready for use.
Concrete-crack-injection
Step 5: Addressing Sunken Slabs
(Slab Jacking)
If your concrete slab isn’t just cracked but has dropped or sunken due to soil erosion, simply filling the crack won’t eliminate the trip hazard. The slab must be leveled back to its original height.
- Polyurethane Foam Injection (Polyjacking): A contractor drills small, penny-sized holes into the slab and injects a high-density expanding foam underneath. The foam expands rapidly, lifting the slab back into place within minutes. This modern method is lightweight, minimally invasive, and long-lasting.
- Mudjacking: An older technique that pumps a heavy slurry of sand, cement, and soil beneath the slab through larger holes. While effective, it adds significant weight to the soil and may not be as durable in areas prone to erosion.
| Method | Best For | Longevity | Cost | DIY Difficulty |
|---|---|---|---|---|
| Crack filler | Hairline cracks | 5–7 years | Low ($50–$100) | Easy |
| Epoxy injection | Wider cracks | 7–10 years | Medium ($100–$200) | Moderate |
| Resurfacing | Multiple cracks, worn slabs | 8–10 years | Medium ($150–$300) | Moderate |
| Professional stabilization | Structural cracks | 10+ years | High ($500+) | Requires contractor |
Pro-Tips for a Long-Lasting Concrete Crack Repair
- Respect the Joints: Never span a crack repair across an existing expansion joint with a rigid material (like epoxy or mortar). If the slab wants to move there, it will crack your repair. Use flexible polyurethane or polyurea for joint lines.
- Weather Matters: Avoid applying chemical resins or sealants in direct, scorching sunlight or high humidity, as it can ruin the chemical cure and cause bubbles or premature failure.